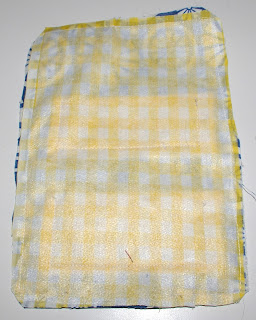
What you'll need:
- Fabric cut to 8"by5" (you'll need one piece of outer fabric, one piece of inner fabric and one piece of fusible interfacing
- Fabric cut to 2.5" by 4" (you'll need two pieces outer fabric, two pieces inner fabric and two pieces of fusible interfacing)
- Iron
- Button
- 2 inch piece of stretch cord
- Fabric rosette (optional, see my DIY Rosette Hair Pin tutorial on how to make these)
- Glue gun if you choose to add a rosette
2) Sew together two of the small pieces of fabric, right sides together on three sides (the two long sides and one short side). Do the same for the other two small pieces of fabric.
3) Clip the corners and turn right side out.
4) Press with an iron, ensuring to fold in the open seam.

5) Sew the small pieces of fabric onto the inside piece of fabric. I got out a couple of credit cards to find where I should place the two pockets.
6) On the outer piece of fabric sew a button about two and a half inches from the bottom of the fabric. I usually eyeball this.
7) Now place the two big pieces of fabric right sides together. At the top of the fabric sandwich place the stretch cord with the loop going inward so when you turn right side out it will be on the outside. Sew an eighth of an inch around the edge, leaving a two inch hole at the bottom (I usually sew a couple times over the spot where you are sewing over the stretch cord). Clip the corners.
8) Turn right side out and press, ensuring fabric is folded in at the open seam.
9) Sew an eighth of an inch around the entire outside of the wallet.
10) If you want to add a rosette now is the time to hot glue it to you wallet, you can either add it directly to the fabric or glue it on top of your button. I iron mine again at this point just to get out any wrinkles and to press down where the folds are. And you're done!
I hope you find this tutorial useful. As always, I would love to find out how your project turns out!
Parties I'm linking to:
DIY Living Party
Blue Cricket Design
Tickled Pink
Sundae Scoop
Talent Tuesdays
Crazy Domestic
Sunday Showcase
Creative Juice Thursday
Saturday Soiree
It's a Hodgepodge Friday
Show and Share Day
Saturday is Crafty Day
Polly Want a Crafter
Let's Sew
Motivate me Monday
Made by you Mondays


you made this look really easy! as a novice in sewing...I think I could tackle this project...i am with ya, i need a smaller wallet!
ReplyDeleteif you have time, please join us at my creative juice party
<3
nicolette @
http://momnivoresdilemma.blogspot.com/2010/12/creative-juice-thursday-3.html
Love it! I've been making wallets too. They are such a fun gift with a gift card tucked inside! Hoping you'll visit me at Sew Chatty and link up to Made With Love Monday! The party will be open until Friday if you want to link up multiple projects. Wishing you a very blessed Christmas! http://sewchatty.blogspot.com
ReplyDeletethanks for linking up!
ReplyDeleteHope to see you back this week...
nicolette
Very cool! I'll have to try making me one of these.
ReplyDeleteAmanda
Ninth Street Notions
I featured this on Talent Tuesday! It's AWESOME! Come grab a featured button if you'd like!!!!
ReplyDeleteMucho love!
-Nichelle
vintagewannabee.blogspot.com
So cute! Thanks for sharing!
ReplyDeleteVery cute fabric choice! Thanks for linking up to the catwalk :)
ReplyDeleteOh... I love this one! I love smaller wallets like this... thanks a lot for sharing! Can't wait what you've got for next week!
ReplyDeleteThey look so cute and I love your color choice.
ReplyDeleteStopping by from Rook No.17
~Bibi~
www.frugalwannabecooks.com
This is a terrific tutorial!
ReplyDeleteI've been wanting to make something similar for myself! Great job. :) Thanks so much for linking up! I hope you'll stop by Tute {Yourself} Tuesday again next week!
ReplyDeleteThank you so much for linking up to "A Little Birdie Told Me...". What a fantastic project! I love the fabrics that you chose, and your tutorial is so well laid out and approachable! I hope you'll return tomorrow to link up and share more of your talent! Best, Jenn/Rook No. 17
ReplyDeleteWoot! Hi, I featured your tutorial as a fave over at Vintage Pollyanna! Looks like you've made it again, girl! http://vintagepollyanna.blogspot.com/2011/01/tell-me-tuesday-9.html
ReplyDeleteTotally adorable and great tutorial. Love the fabrics and button!
ReplyDeleteThanks so much for linking!
ReplyDeleteGreat little project and good tutorial
ReplyDeleteLowri
http://papervinenz.blogspot.com/
These are too cute! And so handy!!! They'd be great to grab out of your purse to run in the store! :) Thanks for linking to Fancy This Fridays!!!
ReplyDeleteGreat tutorial! Love the fabric! Thanks for linking up to Craft and Tell Tuesdays!!
ReplyDeletewww.cherishedbliss.com