Thursday, February 17, 2011

Zipper Pouches

I was busy today and  I made a few coin purses.
I really love the blue and green flower one!
Here's a shot of the inside:

Want to make one of these your own?  Make sure to stop over at whoopdwhoop.com and you can make one your own!

Friday, February 11, 2011

For all you nerds out there....like me!

I tried my hand at freezer paper stenciling yesterday.  As some of you may know, I'm a bit of a math nerd, so chose a math pattern to put on my shirt.
I first cut out my pattern on freezer paper with an Xacto knife.
I ironed it, shiny side down, onto my shirt.  I placed another piece of freezer paper inside my shirt so the paint wouldn't bleed onto the other side of the shirt.  Then painted with fabric paint.
After the paint dried, I peeled up the freezer paper, put a piece of fabric on top of the shirt and run your iron over it.  Then you are done!

Now I have a shirt that shows off my nerdy side.  Freezer paper stenciling ended up being pretty easy.  The hardest (and most tedious) part was cutting out the patter on your paper.  Hope you enjoy!

Thursday, February 10, 2011

Flower Bobby Pins

I'm on a bobby pin making kick lately. I recently made the two flower bobby pins below.
Does the purple flower look familiar?  If you've seen my shoe re-do, it should!  They are the flowers that I took off the shoe.  Take a peek here.

And the second is the remnant of a long zipper that I had to shorten to make a zippered pouch.  I rolled it up and used a glue gun to hold it in place.

Want to see more bobby pin flowers?  Check out my bobby pin rosette tutorial!

Wednesday, February 9, 2011

Heart Necklace

I found this great tutorial for a beaded heart necklace over at Tatertots and Jello.  I thought it was very cute and made one for my sister for her birthday!


I made two hearts each in our birthstones.  Green for me (birthstone is peridot) and Purple for her (birthstone is amethyst).


I think they turned out pretty cute.  Make sure to head on over to Tatertots and Jello to check out the tutorial!

Thursday, February 3, 2011

Swirly Earrings

I made some swirly earrings today.  They were super simple and only took a few minutes to make! 

What you'll need:
  • 2 pieces each of 4 inches of 20 gauge silver wire
  • 2 earring hooks
  • round nose pliers
  • jewelry hammer
  • metal block
 1)  Bend one of your wires in half.
2)  With your pliers create a loop on one end and slightly bend the wire.
3)  Slide the earring hook onto the wire.
4)  Now create a loop with the other end of the wire, like in the picture below.
5)  Put your earring on your metal jewelry block and hammer the curves with your jewelry hammer.  The first picture at the top of this post shows one before it's been hammered and one after.
6) Finish with the other earring, put them in and you're done!

And now for some exciting news.  Eye Spy DIY was featured over at Suzy's Artsy-Craftsy Sitcom!  Go take a look and check out all her amazing projects and great linky party!  Thank you so much Suzy!  You are amazing!

Suzy's Artsy Craftsy Sitcom

Wednesday, February 2, 2011

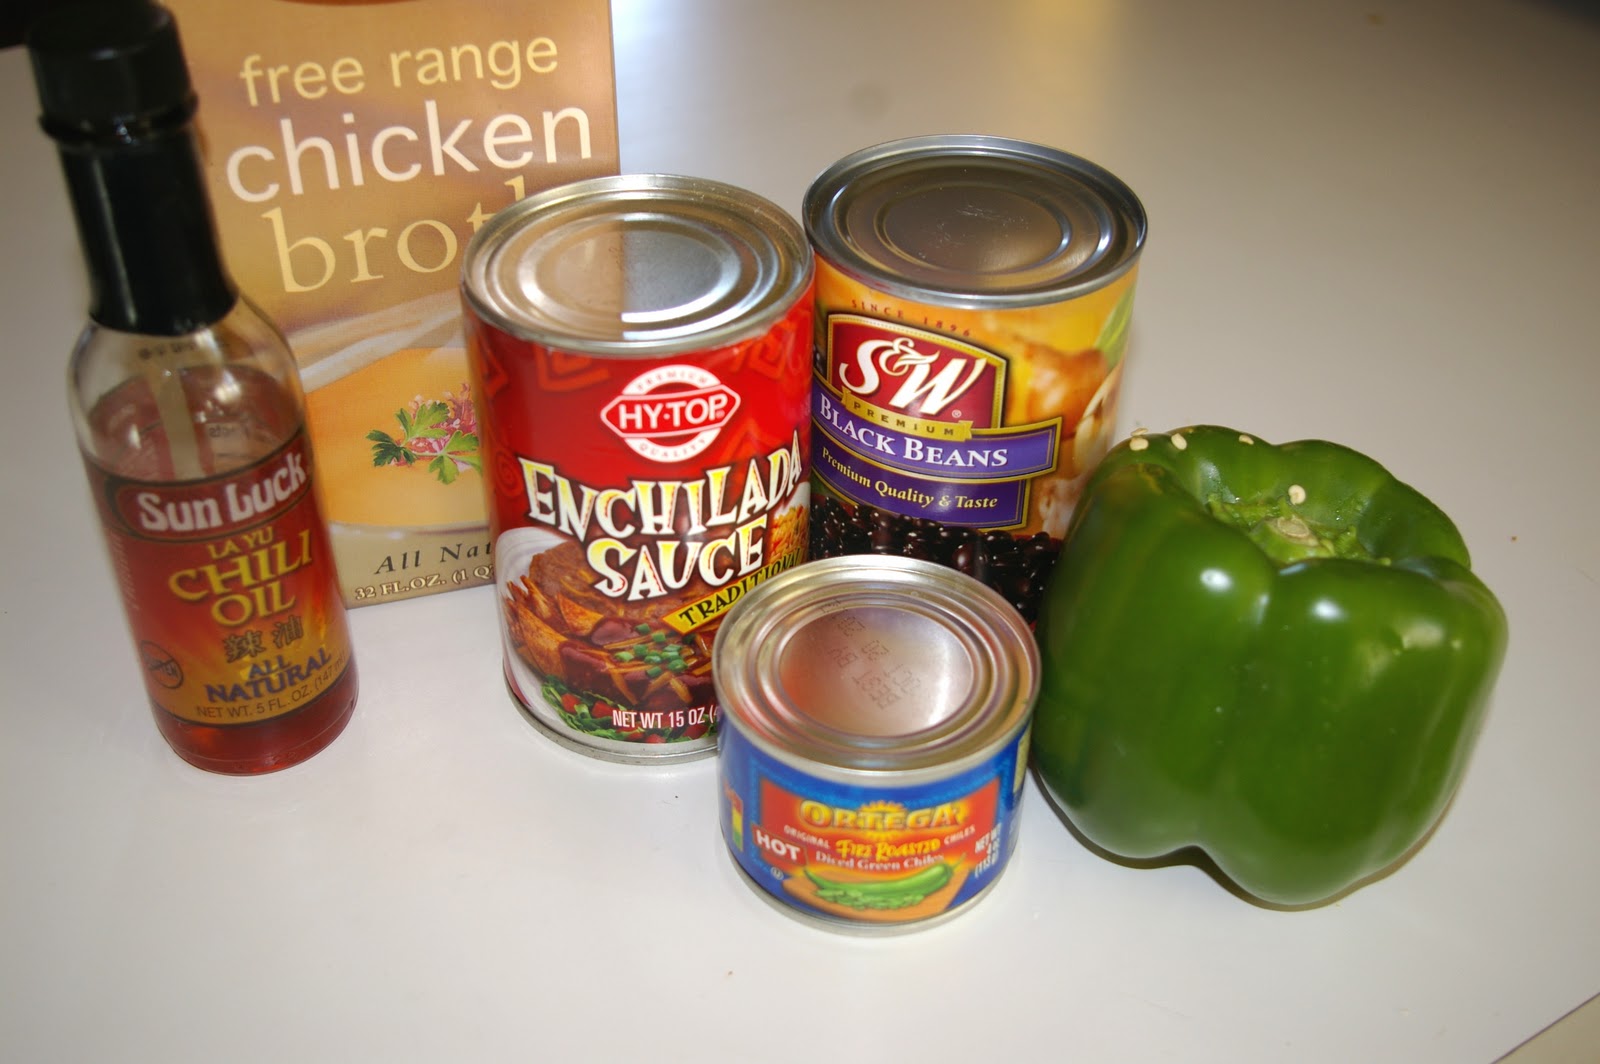
Recipe-Chicken Tortilla Soup

This is my first recipe posting here up on Eye Spy DIY, hopefully everyone enjoys it!  I love spicy food, and especially during these cold winter months nothing is better than soup.  I find myself making this easy chicken tortilla soup a lot during the winter.


Ingredients:
  • Two chicken breasts
  • One can enchilada sauce
  • One can black beans
  • One can stewed tomatoes
  • One can diced green chiles or jalapenos
  • Two bell and one Anaheim peppers (diced)
  • 3 cloves garlic (minced)
  • Chili Oil (1 teaspoon, more if you like spicy)
  • Chicken Stock
  • Tortilla chips

Okay, now here's the really easy part.  Throw everything but the tortilla chips into a crock pot.  Set on low and let cook for 8 hours.  Ladle into a bowl, salt and pepper to taste, and enjoy with tortilla chips!  This is usually my base recipe, you can add different things to make it your own (i.e. corn, potatoes, sour cream, etc.).  Hope you all enjoy this recipe!

Linking up to:

Photobucket

Tuesday, February 1, 2011

More checkbook covers and a couple clutches

I have been making more checkbook covers and zippered pouches lately and thought I would share them with you.
First is my pink and yellow checkbook cover.
Next I made a coordinating pink and yellow gathered zipper clutch, following the great tutorial from over at Noodlehead.  Make sure to check it out; it is a great tutorial!
I made a non-gathered zippered pouch in this adorable animal print.  I made a checkbook cover that matches this as well.  It even has hearts on it, perfect for Valentine's Day!

And last but not least another checkbook cover in brown and yellow map print.  I love this fabric.  I have a pillow that I made out of this too, and best of all, I got the fabric on the clearance rack!
If you would like to make your own checkbook cover, it is extremely easy.  You can see my tutorial here.