Showing posts with label DIY. Show all posts

Wednesday, April 13, 2011

Upcycled Spoon Garden Markers

Spring weather finally came to Idaho a few weeks ago so my husband and I have been in planting/garden mode.  We just made some raised garden beds this weekend and planted our first seeds for our veggie garden!  I needed a way to tell where I had planted certain seeds so we decided to make garden markers out of old spoons.

What you will need:
  • Old Spoons (silver ones are easier to hammer out, but stainless steel ones work too, I had to get my hubby to stamp the stainless spoons)
  • Hammer and/or Sledgehammer (I found it easier to use the sledgehammer rather than a normal hammer to pound them flat)
  • Metal letter stamp set (my piece of advice, buy this at a hardware store, if you try finding it at craft stores they are ridiculously over priced, I got my set for $2.50 at Harbor Freight Tools, I saw them at craft stores for $30)
  • Sharpie
  • Hard surface to pound out your spoons (we used some rocks on our patio)
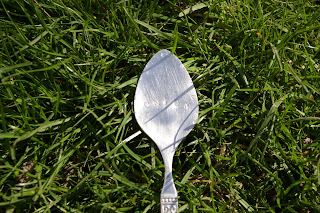
 Take your spoon, put it on a hard surface with the patterned side facing down and smash away with your sledgehammer, until it is flat.  Next get out your letter stamps and place the first letter where you would like it to go and strike it hard with your hammer.  Finish up the rest of your word like this.  It will come out looking something like this.
I found it a bit hard to read it like that so I wanted to fill in the letters.  This is where the sharpie comes in.  You will write over the lettering, pushing the sharpie down hard so it gets in the crevices. 
Next you will take a paper towel or rag and wipe off the sharpie that is not in the crevices.  Most of the sharpie will come off but you may need to get your paper towel/rag damp to get it all off.
You can put the lettering in different patterns; we put cilantro diagonally because it was a longer word.


Now all you have to do is put them in your garden!

    Friday, April 8, 2011

    Pillow Cover Tutorial Part 2 - Hidden zipper and Assembly

    This part of the tutorial will cover putting in your hidden zipper and assembling your pillow.  For part 1 of this tutorial, creating the piping, click here.

    What you will need:
    • The piping you made from part 1 of this tutorial
    • Fabric for the front of the pillow cut to one inch longer and wider than the pillow form (i.e. if your pillow is 12x18 cut your fabric to 13x19)
    • Fabric for the back of the pillow cut one inch wider than your pillow and 2 inches longer that your pillow (so for our 12x18 pillow we would cut the fabric to 14x19 since it will be a long skinny pillow)
    • Zipper
    • Pillow form
    • Sewing machine with regular and zipper feet
    • Scissors
    • Pins
    • Iron
    The first thing we want to do is attach the piping to the front piece of fabric.  You will want to pin the piping to the right side of the fabric and curve around the edges.  Where the beginning and end of the piping meet you will want to cross the two ends over each other.  I try to make this at the bottom of the pillow.
    (Here is where you do as I say and not as I do, and make sure to iron your fabric first!)
    Around the corners you will want to make slits in your fabric with your scissors so it will go around the curve smoothly.
    With your zipper foot on your machine stitch around the entire edge, making sure you are sewing right up against the piping.
    Set that piece aside for now as we're going to work on the back of the pillow now.  Take your back piece of fabric and cut it into two pieces (the direction the zipper will go) about 5 inches from the bottom of the fabric.  Place one piece of fabric on top of the other and center your zipper along the seam.  Mark with pins where the zipper ends (about an inch and a half  or two from each end preferably).
    Set your zipper aside for now.  Put your regular sewing foot back on your machine.  Sew from one end up to the first pin and back-stitch both at the beginning and at the pin.  Now set your stitch length to it's longest setting and sew from the first pin to the second pin making sure not to back-stitch.  Once you get to the next pin, put your stitch length back to it's normal length and sew to the end back-stitching at the pin and at the end.  Iron open your seam.
    Place your zipper over the seam and pin in place, with zipper teeth sitting on top of seam.
    Put your zipper foot back on your machine and sew a rectangle around your zipper.
    Turn it over and it will look like this.


    Now taking either scisssors or a seam ripper either cut or rip the seam open that is over the zipper.  It will then look like this.
    Open your zipper all the way up (this step is important otherwise you wouldn't be able to turn the pillow right side out).  Put your front and back pieces of fabric right sides together and sew around the entire thing, making sure you are still sewing up against the piping.  Turn it right side out.
    Here is what the back looks like.
    Put your pillow form into the pillow and zip close and you're done!  I would love to see how your pillows turn out!


    Tuesday, April 5, 2011

    Pillow Cover Tutorial Part 1-Piping

    This is part one of my pillow tutorial.  It will cover how to make your own piping!  First you will need to gather your materials.

    What you will need:
    • Fabric that you will make your piping out of
    • Cording (length should be the perimeter of your pillow fabric plus a few inches)
    • Sewing machine with zipper foot
    You will need to cut your fabric on the bias, which is just a fancy word for cutting it diagonally.  I made my strips one and a half inches wide.  If your cording is somewhere around a half inch this should work for you.  If you go bigger I would cut your fabric strips a little wider.
    You will need a bunch of these strips to cover your cording.  Sewing the fabric strips together is very easy.  Take two of your strips and place them one on top of the other at a right angle (if your fabric has a right and wrong side put right sides together).  Then sew diagonally across the strips.
    Trim the excess fabric from the corner and fold open.
    Sew enough fabric strips together to cover your cording.  Place your cording in the center of your fabric strips.  If your fabric has a right/wrong side place the cording on the wrong side.
    Fold your fabric over the cording.
    Next put your zipper foot on your sewing machine and sew right up against the edge of the cording.
    Sew all the way to the end and you have your cording done and ready to be added to your pillow!
    Stay tuned for part 2 of this tutorial where we will put in a hidden zipper and assemble our pillow with this cording!

    Monday, March 21, 2011

    Make your own magnets!

    I'm sure you all have seen the magnets made of the clear glass mancala beads (or flat marbles).  But did you know how easy and inexpensive they are to make?

    First you'll need to gather your materials:
    • Mancala beads (you can find them at most craft stores, usually in the fake flower section, and I have also found them at the dollar store)
    • Magnet of some sort, either the small flat round magnets, or magnet strip; however, I'll warn you the magnetic charge on the strips of magnets is pretty weak.  I used them in this tutorial but that is because I happened to have a roll of it lying around
    • Glue (I used E-6000 which you can find at most craft stores)
    • Magazine pages, scrapbook paper, etc. (anything with a pattern you like on it!)
    Once you've got everything together, start cutting out patterns from your magazine/scrapbook paper into the shape of the mancala bead.  I usually cut my paper slightly smaller than the bead itself so it doesn't hang off the edges, and the beads slightly magnify the image so from the front it looks like it goes to the edges.

    Also if you're not sure how a pattern would look on a magnet I will hold the mancala bead over the magazine page to see what it looks like.
    Put a dab of glue on the piece of paper.
    Place your mancala bead on top of the paper and press down.  You'll see the glue spread under the bead and you want to push until it has spread to all of the edges.
    Now we want to add the magnet to the bead.  If you have round magnets you'd just put glue on one side of the magnet and stick it to the back of the mancala bead.  If you are using magnetic strips you'll want to cut a piece of magnet to the size you want.  Peel the tape off the back of the magnet and add a dab of glue to the sticky side.
    Then stick this onto the back of the mancala bead.  Let the glue dry for a couple hours (or however long the instructions on the glue say) and you've got your very own customized magnets!

    Here are some that I made out of a map in a Dwell magazine:
    And here are some that I made in some shades of blue that I liked:
    Have you made some magnets like these?  I would love to see how yours turned out!

    Tuesday, March 15, 2011

    Beginner's Quilt

    I'm sure as many of you can guess I'm pretty new to the sewing world and figuring things out as I go along.  I love quilts but the idea of making one has always kind of scared me.  I decided to try to piece together a quilt, but make it a beginner's quilt.

    There's my kitty Gaia checking it out!  
    It's not perfect, but I think it's a pretty decent first attempt.  Even better, it was pretty easy!  I started out by cutting out a bunch of fabric rectangles that were 8x10" (12 of each in three different fabrics).  I arranged them on my coffee table in the pattern I wanted then started sewing rows of them together.

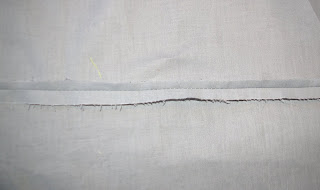
    After I got six rows of six done, I started sewing the rows together.  Here's a peek at the back.
    Then when I was done with that I made a sandwich of back fabric, quilt batting, and my sewn together pieces (right sides together with batting in the middle).  I sewed around the entire thing leaving a big opening for turning.  I turned right side out and then hand sewed the opening closed.  Pretty easy, even for a beginner like me!

    Thursday, February 10, 2011

    Flower Bobby Pins

    I'm on a bobby pin making kick lately. I recently made the two flower bobby pins below.
    Does the purple flower look familiar?  If you've seen my shoe re-do, it should!  They are the flowers that I took off the shoe.  Take a peek here.

    And the second is the remnant of a long zipper that I had to shorten to make a zippered pouch.  I rolled it up and used a glue gun to hold it in place.

    Want to see more bobby pin flowers?  Check out my bobby pin rosette tutorial!

    Wednesday, February 9, 2011

    Heart Necklace

    I found this great tutorial for a beaded heart necklace over at Tatertots and Jello.  I thought it was very cute and made one for my sister for her birthday!


    I made two hearts each in our birthstones.  Green for me (birthstone is peridot) and Purple for her (birthstone is amethyst).


    I think they turned out pretty cute.  Make sure to head on over to Tatertots and Jello to check out the tutorial!

    Thursday, February 3, 2011

    Swirly Earrings

    I made some swirly earrings today.  They were super simple and only took a few minutes to make! 

    What you'll need:
    • 2 pieces each of 4 inches of 20 gauge silver wire
    • 2 earring hooks
    • round nose pliers
    • jewelry hammer
    • metal block
     1)  Bend one of your wires in half.
    2)  With your pliers create a loop on one end and slightly bend the wire.
    3)  Slide the earring hook onto the wire.
    4)  Now create a loop with the other end of the wire, like in the picture below.
    5)  Put your earring on your metal jewelry block and hammer the curves with your jewelry hammer.  The first picture at the top of this post shows one before it's been hammered and one after.
    6) Finish with the other earring, put them in and you're done!

    And now for some exciting news.  Eye Spy DIY was featured over at Suzy's Artsy-Craftsy Sitcom!  Go take a look and check out all her amazing projects and great linky party!  Thank you so much Suzy!  You are amazing!

    Suzy's Artsy Craftsy Sitcom