Showing posts with label handmade. Show all posts

Wednesday, December 15, 2010

Handmade for the Holidays - Christmas Coasters

Making your own fabric coasters is an easy and inexpensive gift idea.
What you'll need:
  • 4.5" x 4.5" pieces of fabric (4 each of front fabric, back fabric, and felt for the inside)
  • Sewing Machine
  • Scissors
  • Iron


1) First make a sandwich out of your fabric (right sides together) and then place one of the pieces of felt on top.  Stitch around the fabric sandwich but leave a two inch gap on one side
 
2) Cut the corners off diagonally (see below)

3) Turn right side out so that the felt will be in the center.  Fold in the fabric on gap and iron flat

4) Start sewing along the edges (starting with the side with the opening) 1/4 inch away from the edge. Sew around all four sides, on the last side stop 1/4 inch away from where you began sewing and turn, sew until you are 1/4 inch from the next seam and turn, continue doing this until you are to the center of your coaster.
5)  Once you have reached close to the center sew one of your seams so that it meets the next (see the center of my picture below.  You're done, clip any loose ends of threads and you've got your coaster!
Here's the front of my finished project:

Monday, December 13, 2010

DIY Rosette Hair Pins

I've been seeing rosettes all over the place lately and love them!  So decided to make some of my own and will show you how to do it too!  It's extremely easy and a good way to use up your fabric scraps.
What you'll need:


  • Bobby pins-I got some from a craft store that are more flat than normal bobby pins, but don't see why you could use regular bobby pins
  • 1" by 12" piece scrap of fabric (smaller if you want smaller rosettes)
  • Glue Gun
  • Scissor
1)  Fold your piece of fabric in half so that the one inch edge will be a half inch and glue with glue gun (just one end of the fabric)

2) Fold your piece of fabric in half again and glue (will be a quarter of an inch wide)
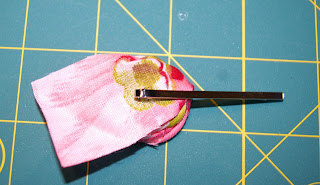
3) Twist a few inches of your fabric up.  Use the quarter inch end as a small base, but a dab of glue there and start wrapping your twirled fabric in a circle (like in the picture below)
4)  Keep twirling and wrapping around the circle making sure to secure with a dab of hot glue every 1/4-1/3 of the way around the circle

5) When you get toward the end leave about an inch of fabric and glue it underneath the rosette


6) Next put a dab of glue on the back of your rosette and place your bobby pin in the glue


7) Clip the tail off of your rosette with your scissors

And you're done!  Make as many as you want in coordinating colors and wear them yourself or give them as gifts.
 
Linking to:

Thursday, December 9, 2010

Felt Veggies

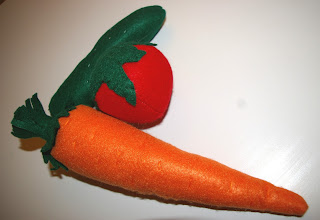
I was browsing online the other day looking for a birthday present for my niece.  I came across the Duktig felt vegetable playset from IKEA and thought Hey I could do something like that!  So I set forth on my venture to make felt play vegetables.  Here's how they turned out:
 
I like the potato and pea pod best!
Hopefully my niece will love it!  Do you have any great felt projects?  Let me know about them!

Linked up on:

Photobucket


Handmade for the Holidays - DIY Coffee Sleeve

I'm normally pretty good about bringing my reusable coffee cup to me when I get a latte.  However, there are times when I forget it.  I always feel bad using the little cardboard sleeves so have started carrying one of my handmade coffee sleeves in my purse for whenever I forgot my travel mug.  And if you make it in green or red it makes a perfect, quick, and inexpensive handmade gift for the holidays!


What you'll need:
  • Scrap of fabric
  • Iron on interfacing
  • Button
  • Stretch chord (2 inches)
  • Rotary cutter or scissors
  • Needle and thread
  • Coffee sleeve for template
  • Iron
  • Sewing Machine

1) You will need to cut out the two pieces of fabric and one piece of the interfacing.  I put the cardboard template on top of fabric/interfacing and cut a quarter inch around the template.

2) You will need to iron the interfacing to the fabric (if your fabric has a side you will need to iron onto the wrong side of the fabric).

3) Now sew the button onto your fabric about two inches in from one end.


4) Put the two pieces of the fabric wrong sides together and place your chord on the inside of the fabric sandwich with the loop facing in.


5) Now sew around the two long sides and the side that the chord is on with a quarter inch seam allowance.  Turn inside out.  Fold the open edges in about a quarter inch and then iron.
6) Now sew a quarter inch around the entire coffee sleeve to finish it off.  I didn't have any cardboard cups so had to take a picture of it on one of my mugs.  See the finished product below.  Pretty cute huh?

Let me know how yours turns out!  Would love to see yours.

Linked up on:
 
The DIY Show Off


Photobucket

Photobucket


Polly Wanta Crafter