Spring weather finally came to Idaho a few weeks ago so my husband and I have been in planting/garden mode. We just made some raised garden beds this weekend and planted our first seeds for our veggie garden! I needed a way to tell where I had planted certain seeds so we decided to make garden markers out of old spoons.
What you will need:
- Old Spoons (silver ones are easier to hammer out, but stainless steel ones work too, I had to get my hubby to stamp the stainless spoons)
- Hammer and/or Sledgehammer (I found it easier to use the sledgehammer rather than a normal hammer to pound them flat)
- Metal letter stamp set (my piece of advice, buy this at a hardware store, if you try finding it at craft stores they are ridiculously over priced, I got my set for $2.50 at Harbor Freight Tools, I saw them at craft stores for $30)
- Sharpie
- Hard surface to pound out your spoons (we used some rocks on our patio)
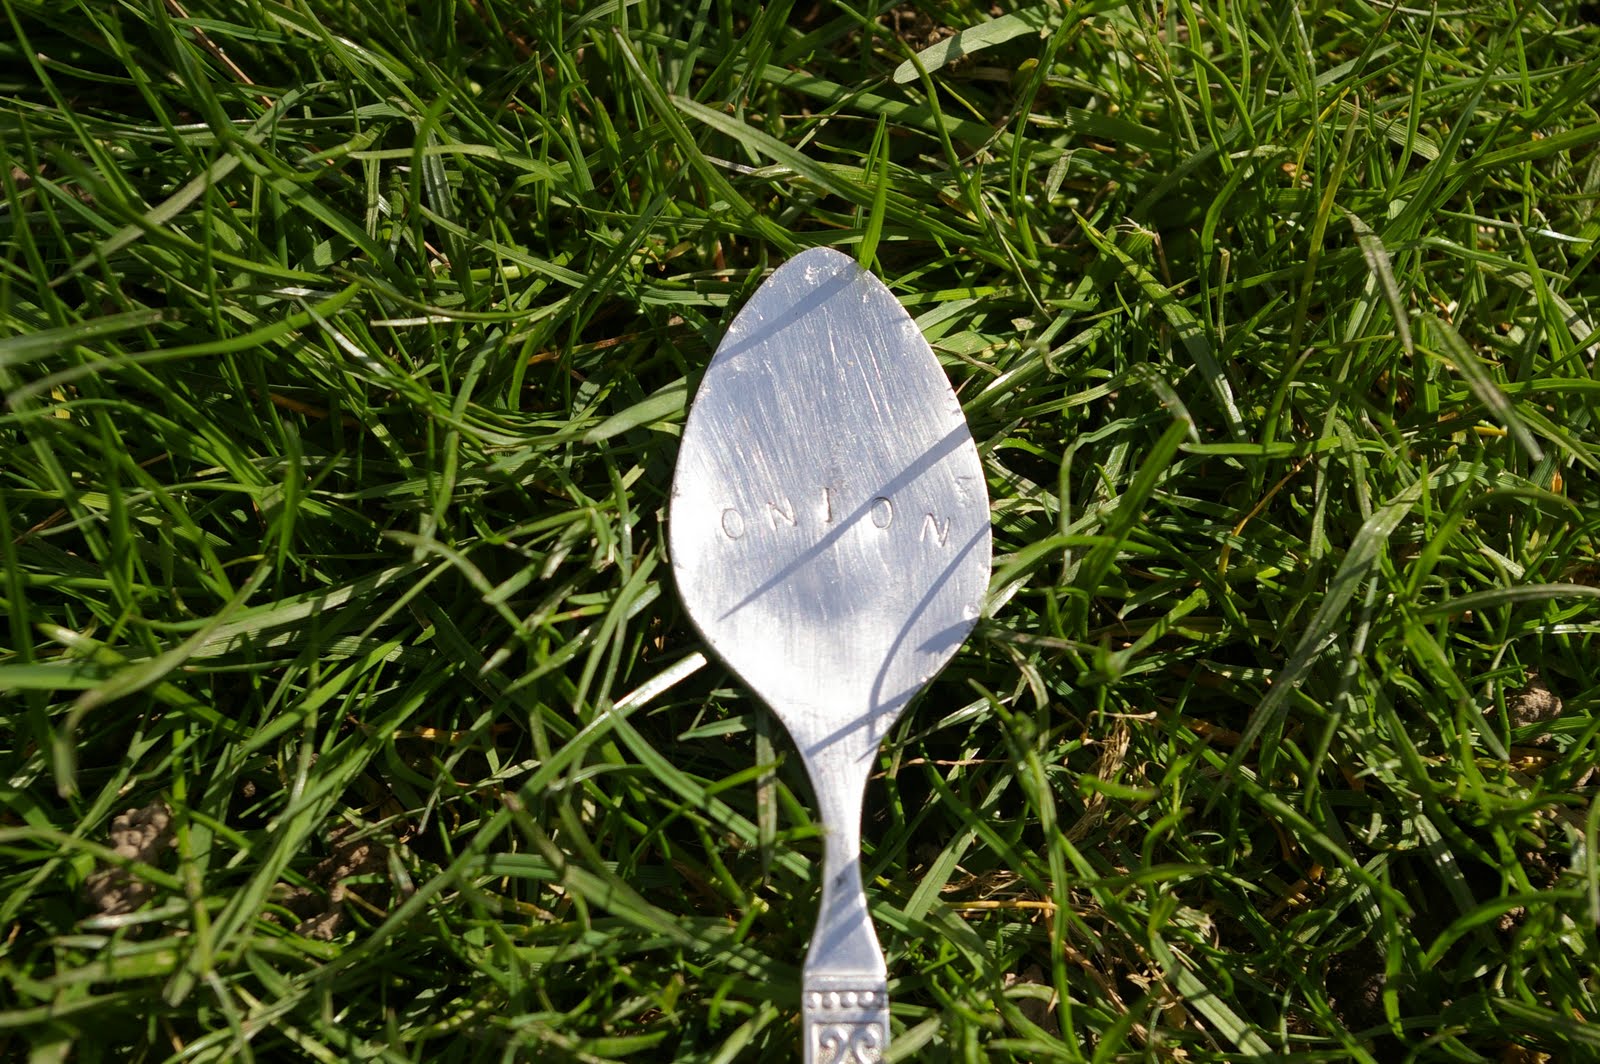
Take your spoon, put it on a hard surface with the patterned side facing down and smash away with your sledgehammer, until it is flat. Next get out your letter stamps and place the first letter where you would like it to go and strike it hard with your hammer. Finish up the rest of your word like this. It will come out looking something like this.
I found it a bit hard to read it like that so I wanted to fill in the letters. This is where the sharpie comes in. You will write over the lettering, pushing the sharpie down hard so it gets in the crevices.
Next you will take a paper towel or rag and wipe off the sharpie that is not in the crevices. Most of the sharpie will come off but you may need to get your paper towel/rag damp to get it all off.
You can put the lettering in different patterns; we put cilantro diagonally because it was a longer word.
Now all you have to do is put them in your garden!


Katie,
ReplyDeleteHi! I'm Ginger from over at whoopdwhoop. Just got one your checkbook covers & thought I'd drop by and say hi! :) I'm a new follower, too.
I just started my own craft blog over at gingersnapcrafts.blogspot.com You should check it out sometime. :)
I would love to post one of your tutorials over on my blog sometime. Just email me if your are interested at gczbowie at yahoo dot com Subject line gingersnaps :)
Thanks again for the checkbook cover. :)
Ginger
OMGoodness! Great idea! Harbor Freight is right down the road from me too! I just planted too (live in E. Washington), and I was using a paint stirrer to make the rows....which wouldn't have lasted long.
ReplyDelete--Katie
www.blah2beautiful.blogspot.com
Those are way cool! What a great idea. I love how they came out!
ReplyDeleteRachel @ Maybe Matilda
super cute sista!
ReplyDeleteI so wish I had a green thumb. Alas no. But i love veggies from the garden. I am coming to you from naptime crafters and happy to be your newest follower. Please stop by for book club or blog design in you're interested--connie, measuredbytheheart.blogspot.com
ReplyDeleteThese are so awesome! I actually bought a stamping set online but it got lost in the mail!! ahh! So im trying to find it! I would love to make some garden markers for my garden.
ReplyDeleteNew Follower
Angie
www.create-it-fab.blogspot.com
these are great!!! i made some before and the letters didn't show up well- thanks for the sharpie tip!
ReplyDeleteI love these! Thanks so much for the tip about the hardware store!
ReplyDeletedreaming-n-color.blogspot.com
Thanks for the tip about purchasing the letter stamps at a hardware store. Much cheaper!
ReplyDeleteKatie, thanks for linking up...this is a great garden project...
Hope to see you back again next week at Creative Juice Thursday!
I love this! I definitely want to find some at a hardware store now... I've been thinking about various gardening-related crafts to do and I feel like you read my mind with this one! : )
ReplyDeleteI'm so excited I had to leave a second comment - I went and checked out Harbor Freight Tools to see if they were in my area of the country and discovered they had a website and they ship stuff AND they had these available - on sale for $5 and then you can google various coupon codes to get them even cheaper. You probably have to pay around $6 for shipping, but still a very cheap option (relative to others I've seen)! Thanks again for the tip! Another reason I LOVE your blog!
ReplyDeleteThanks for the great tutorial! I've been wondering how to make these!
ReplyDeleteBeautifull!!!!!!
ReplyDeletea blessing!!!! i've been out in my hubbys shed trying to figure out the BEST way and the BEST hammers to use, etc., and how to make the letters black...you answered every question....now i just need to PRACTICE PRACTICE PRACTICE without smashing my fingers!!! YIKES! and your little set of letters that you got from the hardware store for a couple bucks? looks EXACTLY LIKE MINE that my sister purchased for about $30 so that is an amazing tip! thanks a million!
ReplyDeleteI totally LOVE the idea of reusing spoons this way. I've also seen some super cute bracelet ideas using spoons and stamping messages into the oval part. Do you mind sharing where you got your stamping set? I've been looking but haven't found exactly what I am looking for just yet.
ReplyDeleteThis is such a unique idea! One day I'll get to have my garden!! I might use it in some potted plants though for a little pizazz!!
ReplyDeleteI would love it if you would share this at my party!
http://www.cherishedbliss.com/2011/04/craft-and-tell-tuesdays-1.html
I am so making some of these... they are lovely xo
ReplyDeleteThese are so great! I am visiting from Young Nester and I am a new follower!!
ReplyDeleteHope you have a great day!
Michelle
www.delicateconstruction.blogspot.com
Oh my gosh that is such a great idea! going to have to try this in our garden!
ReplyDeleteI have been wanting to do this! Thanks for the details. We have a Harbor Freight but I've never been to it. Now I will!
ReplyDeleteOk, I found this on the link party at SugarBee's, and I had to come follow you as I got the stuff to do the same thing the other day! Great minds. ;)
ReplyDelete~K
bigklittlea.blogspot.com
2.50?? really? I've wanted to do this forever, but thought the stamping stuff would be too $$$. You have so encouraged me to seek it out! local hardware store only or big box too?
ReplyDeleteOh I love this!!! I wish I hadn't just thrown out all that old silverware. But no fear, yard sale season is just around the corner!!! :) So glad to have found your blog. It is CHARMING!
ReplyDeleteThose are awesome! Thanks for commenting on my green owl. Happy weekend to you =)
ReplyDeleteKatie, I'm so happy to have your excellent tutorial. I bought one of those alphabet kits a while ago, but have had a lot of questions about the specifics of making the spoon garden markers. You answered them all!
ReplyDeleteThank you so much for being a part of "A Little Birdie Told Me..." Tuesday at Rook No. 17
Jenn
This was featured on Cherished Bliss. Stop by to pick up your featured button!
ReplyDeletewww.cherishedbliss.com
These are amazing thanks for sharing the idea!
ReplyDeleteFound your great idea at Rook 17! New follower...look forward to seeing more of your DIY ideas!
ReplyDeleteI highlighted this fabulous idea on my little blog at http://wadelmat.blogspot.com/2011/05/happy-mothers-day.html
ReplyDeleteThanks for sharing!
Fantastic site. A lot of helpful information here. I am sending it
ReplyDeleteto a few buddies ans also sharing in delicious. And of course, thank you in your effort!
My web page ; how to download movies
This comment has been removed by a blog administrator.
ReplyDeleteThis comment has been removed by a blog administrator.
ReplyDelete