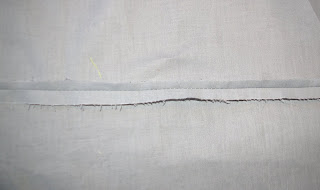
What you will need:
- The piping you made from part 1 of this tutorial
- Fabric for the front of the pillow cut to one inch longer and wider than the pillow form (i.e. if your pillow is 12x18 cut your fabric to 13x19)
- Fabric for the back of the pillow cut one inch wider than your pillow and 2 inches longer that your pillow (so for our 12x18 pillow we would cut the fabric to 14x19 since it will be a long skinny pillow)
- Zipper
- Pillow form
- Sewing machine with regular and zipper feet
- Scissors
- Pins
- Iron
(Here is where you do as I say and not as I do, and make sure to iron your fabric first!)
Around the corners you will want to make slits in your fabric with your scissors so it will go around the curve smoothly.
With your zipper foot on your machine stitch around the entire edge, making sure you are sewing right up against the piping.
Set that piece aside for now as we're going to work on the back of the pillow now. Take your back piece of fabric and cut it into two pieces (the direction the zipper will go) about 5 inches from the bottom of the fabric. Place one piece of fabric on top of the other and center your zipper along the seam. Mark with pins where the zipper ends (about an inch and a half or two from each end preferably).
Set your zipper aside for now. Put your regular sewing foot back on your machine. Sew from one end up to the first pin and back-stitch both at the beginning and at the pin. Now set your stitch length to it's longest setting and sew from the first pin to the second pin making sure not to back-stitch. Once you get to the next pin, put your stitch length back to it's normal length and sew to the end back-stitching at the pin and at the end. Iron open your seam.Place your zipper over the seam and pin in place, with zipper teeth sitting on top of seam.
Put your zipper foot back on your machine and sew a rectangle around your zipper.
Turn it over and it will look like this.
Now taking either scisssors or a seam ripper either cut or rip the seam open that is over the zipper. It will then look like this.
Open your zipper all the way up (this step is important otherwise you wouldn't be able to turn the pillow right side out). Put your front and back pieces of fabric right sides together and sew around the entire thing, making sure you are still sewing up against the piping. Turn it right side out.
Here is what the back looks like.
Put your pillow form into the pillow and zip close and you're done! I would love to see how your pillows turn out!


Thank you for the tutorial. I was actually wondering about this today,so thank you again.
ReplyDeleteConnie
you are out of control! nice work and great tutorial :)
ReplyDeleteHi Katie! I Featured you in my 1st ever Link party "Features"! I have a Featured Button to post on your blog if you want to;)
ReplyDeletexoxokara
Lovely! Thanks for auditioning for OMTWI!!
ReplyDeleteGreat tutorial! I really want to make some pillows like this. Thanks for linking up at I Made It! Monday at Ninth Street Notions. Can't wait to see what you have this next week.
ReplyDelete