Monday, January 3, 2011

Thrift Store Bowl Re-Vamp

I found this bowl for $1.50 at a local thrift store.  I loved the shape! I did not love the brassy finish.
I was headed to Fred Meyer's to pick up a few things so decided to check out their spray paint section.  They had a pretty good selection to choose from.  And best of all, they were all on sale!  So what color to choose?  If you knew me in real life, you probably wouldn't even have to think about the answer.  Why grey of course!

So with an inexpensive thrift store bowl and a can of Krylon gloss spray paint I transformed my brassy bowl into something more modern and much more my style:
 

Sunday, January 2, 2011

Braided Headband

I guess I'm really into hair accessories lately since this is my second hair accessory tutorial in just a few weeks.  I got a braided headband about a year ago from Urban Outfitters, and it seemed like something I could make myself.  So I went ahead and tried!

What you'll need:
  • Three strips of fabric, I did mine about 16 inches long, but ended up having a pretty long piece of elastic, so if I were to do it again, I'd use around 20 inches strip of fabric
  • Elastic (1/8 of an inch of 1/4 of an inch; I didn't have any this size so took a half inch elastic and cut it down the middle)
  • Bobby pins or clip of some sort to hold ends together
  • Sewing machine or needle and thread
  • Scissors

1)  Clip your three strips of fabric together at the top with your bobby pin (or clip).
2)  Braid your fabric together until you reach the end of the strips.


3)  Once you've reached the end of your fabric sew the ends together using your sewing machine or needle and thread.  Trim any excess fabric.


4)  Place your braided fabric on your head and then measure how long a piece of elastic you will need.
5)  Cut your elastic about a half inch shorter than what you measured (this makes sure that headband will stay on and not be too big).
6)  Sew one end of the elastic to the end of the fabric braid.
7)  Now sew the other end of the elastic to the other end of the fabric braid.

Now you've got your headband!

Friday, December 31, 2010

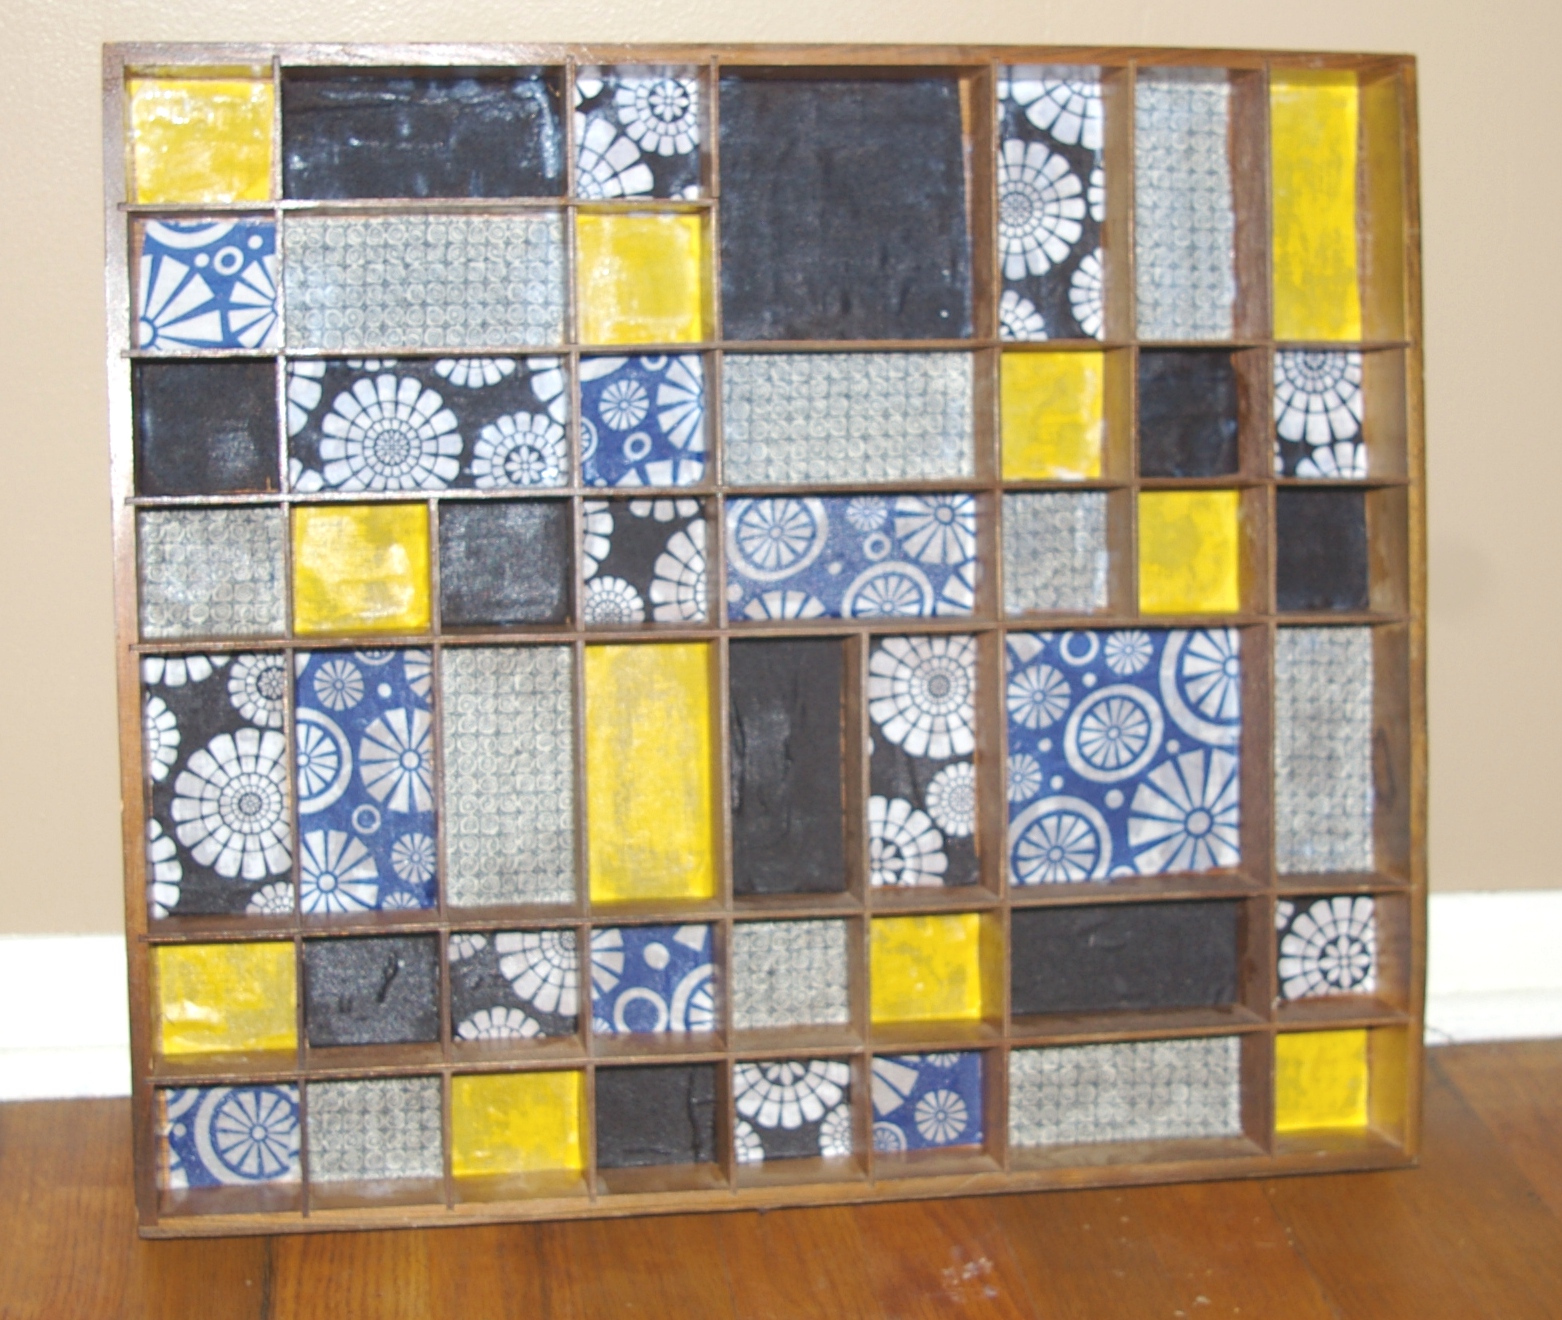
Shelf with fabric background {thrift store project}

I love the idea of taking something old and bringing new life to it.  My sister and I hit the thrift stores yesterday in search for some good finds that we could spruce up!  I took an inexpensive shelf and turned it into a piece of art with a little bit of fabric and some mod podge.


I found this shelf for $2.99 and I had to pick it up.  I knew that I could turn this into a piece of artwork. 
Want to know how to do this yourself.  It's very easy!

What you'll need:
  • Thrift store find shelf
  • Mod Podge
  • Fabric scraps
  • Scissors or Rotary cutter
  • paintbrush
1)  Cut scraps of fabric to the size of each of the spaces of the shelf using the scissors or rotary cutter.
2)  Using your paint brush put a layer of Mod Podge onto the shelf
3)  Lay fabric onto the Mod Podge
4)  Put another layer of Mod Podge on top of the fabric

5)  Let dry 

Voila! You have an inexpensive and unique piece of artwork!

Wednesday, December 29, 2010

Another stamp - little bird

So, I may become addicted to making stamps.  It's so easy and pretty fun.  Here's a little bird stamp taht I made last night!


If you want to know how to make these yourself make sure to see my tutorial.

Tuesday, December 28, 2010

Make your own stamps

I love stamps, but hate spending so much money on them.  And also wish I could customize them.  I decided to try out making my own stamp.  Plus I think it would be great to be able to stamp my own patterns onto fabric.  Below is my first attempt at stamp making.
What you'll need:
  • Rubber eraser
  • Pencil
  • Wood carving tool
  • scissors
1)  Draw your pattern onto your eraser making sure the parts that you want to show up are colored in with pencil and those you don't want to show up on your stamp are left blank.


2) Using your wood carving tool, start carving out any of the parts that are not colored in with pencil.


3)  When you have finished carving out all of the pieces that are not colored in with pencil, then carve around the outside edge of your design.  Then using your scissor cut around your design and you're ready to stamp!


I think this turned out pretty successful and I will post all the stamps I make here!  I would love to see how yours turn out!

Saturday, December 25, 2010

Wednesday, December 22, 2010

I love owls ornament!

I love owls!  So when I saw the owl ornament banner over at West Elm I got excited, but they didn't have the ornament for sale.  It looked easy enough to make so I decided to make it myself.


I just took 1 inch strips of cardstock and ran it through my paper crimper that I got at the dollar store a few years back.  Then started rolling them up and gluing along the way with my glue gun to make the eyes and belly.  I glued in some black beads for the eyes.  Then I added a few wing feathers, some eyebrows, and a beak.  And voila my very own West Elm inspired owl ornament!